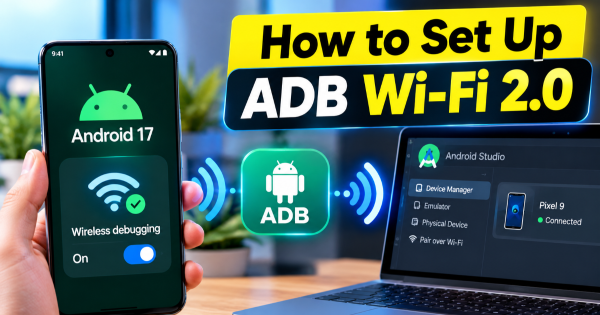
How to Use ADB Wi-Fi 2.0 for Wireless Android Debugging
ADB Wi-Fi 2.0 makes Android wireless debugging easier to pair and more resilient across trusted networks. This guide covers requirements, pairing, verification, and troubleshooting.

On this page
USB cables are no longer the only practical way to debug an Android device from a computer. Google’s ADB Wi-Fi 2.0, introduced with Android 17 and Android SDK Platform-Tools 37.0.0, is designed to make wireless debugging easier to pair and more reliable when network conditions change. This guide walks through the setup, explains what changed from older wireless debugging, and shows how to check that the new connection is actually working.
What ADB Wi-Fi 2.0 changes
Android Debug Bridge, or ADB, is the developer tool that lets a computer communicate with an Android device for tasks such as installing builds, running commands, and debugging applications. Earlier wireless debugging already removed the need for a USB cable, but connections could become inconvenient when devices changed networks or were powered off. Google says ADB Wi-Fi 2.0 reworked the ADB server, the device-side ADB daemon, and Android Studio to address those problems.
The biggest practical change is automatic reconnection on a trusted wireless network. Google says its new multicast DNS, or mDNS, stack replaces the older discovery components, while the device-side daemon can disable wireless ADB on an untrusted network and enable it again when the device returns to an allowed network. Google also reports a 32% improvement in automatic connection success and a 66% increase in connection speed for 90% of connections. Those figures are Google's measurements, not an independent benchmark, so they are best treated as an indication of the intended improvement rather than a guarantee for every network.
Check the requirements before pairing
For ADB Wi-Fi 2.0 specifically, the device must run Android 17 or newer and the workstation needs ADB 37.0.0 or newer. Android's documentation still supports wireless ADB on Android 11 and later, but the new 2.0 behavior is tied to Android 17. Your computer and device should also be connected to the same wireless network.
Update the SDK Platform-Tools package on your computer before starting. If you use Android Studio, the current stable Quail 4 release is version 2026.1.4 and includes the current Android development tooling. You do not need to use Android Studio for command-line ADB, but Android Studio provides a simpler graphical pairing workflow.
Enable wireless debugging on the Android device
On the Android device, open Settings and enable Developer options if they are not already available. Inside Developer options, open Wireless debugging and enable it. When Android asks whether wireless debugging is allowed on the current network, choose the option that trusts the network if it is a network you control and intend to use for development.
This trusted-network setting matters because ADB is a developer interface with access to the device. ADB Wi-Fi 2.0 is designed to stop wireless ADB from remaining active when the device detects an untrusted network, then resume it when the device returns to an allowed network. That behavior is more useful than simply leaving a debugging service exposed everywhere.
Pair the device from Android Studio
Android Studio provides the easiest route if you prefer not to manage pairing from a terminal. Open Device Manager and choose the option to pair a device over Wi-Fi. With Wireless debugging enabled on the phone, the pairing interface can use a QR code or a pairing code to establish the trusted relationship.
- Connect the computer and Android device to the same Wi-Fi network.
- Enable Wireless debugging in the device's Developer options.
- Open Android Studio and launch Device Manager.
- Choose the option to pair a device over Wi-Fi.
- On the phone, choose the QR-code or pairing-code method requested by Android Studio.
- Complete the pairing process and wait for the device to appear as connected.
You only need to pair the workstation and device once unless you explicitly forget the pairing or revoke ADB authorizations. After that, Android's documentation says the device can automatically connect when both ends are on the same network and the network is trusted.
Pair from the command line when you do not need Android Studio
You can also use the ADB command-line tool directly. On the phone, select Pair using pairing code under Wireless debugging. Android displays an IP address, port, and temporary pairing code. Open a terminal on the computer, change to the SDK Platform-Tools directory if necessary, and run:
adb pair ip-address:portReplace ip-address:port with the address and port shown by the phone. When ADB asks for the pairing code, enter the code displayed on the device. A successful pairing confirms that the computer is authorized to communicate with that device over wireless debugging.
There is an important distinction here: adb pair establishes the pairing relationship, while the newer ADB service discovery is responsible for finding and reconnecting to the paired device. You should not treat the pairing command as something you need to repeat every time you sit down to develop.
Verify that ADB Wi-Fi 2.0 is actually active
If you want to confirm that the computer is using the expected ADB version, run:
adb server-statusLook for an ADB version of 37.0.0 or higher and an mDNS status showing that discovery is enabled. Android's documentation also provides a direct way to inspect the discovery services:
adb mdns track-services --proto-textFor an Android 17 device using ADB Wi-Fi 2.0, the output should identify an mDNS service version of 2.0 or higher. If the service version is older, the device is not using the new ADB Wi-Fi 2.0 implementation, even if ordinary wireless debugging works.
Test the connection without touching the USB cable
Once the device appears in ADB, verify it from the terminal with:
adb devicesYour device should appear in the list with a connected state. At this point you can install a debug build, launch an application, inspect logs, or run other normal ADB commands without plugging the phone into the computer.
A useful real-world test is to lock the device, move between normal development tasks, and reconnect to the same trusted Wi-Fi network. The point of ADB Wi-Fi 2.0 is not simply that an application can run without a cable; it is that the wireless connection should require less manual recovery during an ordinary development session.
Fix discovery problems before changing your app
If pairing succeeds but the device does not automatically appear later, check the network before changing Android Studio settings. The workstation and device must be able to discover each other through mDNS, and some managed, guest, or isolated Wi-Fi networks block the traffic needed for device discovery. Android's documentation includes adb mdns track-services --proto-text specifically for checking whether the network is exposing the expected ADB service.
If the command produces no relevant service information, the network may not support the required mDNS discovery path. Android's documentation also says that ADB can report its active mDNS backend through adb server-status. This gives you a more useful diagnostic path than repeatedly pairing the same device when the underlying problem is network discovery.
When wireless debugging is the better choice
ADB Wi-Fi 2.0 makes the most sense when you repeatedly deploy to a physical phone or tablet and want to keep the device free from a USB cable. It is particularly convenient for testing device behavior while the handset is positioned away from the workstation, and it can reduce the friction of repeatedly plugging and unplugging a development device.
USB debugging still has a place. A wireless connection depends on the local network, so a poorly configured access point can introduce problems that do not exist over a cable. Wireless debugging also should not be enabled casually on networks you do not trust. The useful change in ADB Wi-Fi 2.0 is that Android now treats network trust and automatic discovery as part of the workflow rather than leaving developers to recover every dropped connection manually.
What to do after the first successful setup
Once the device is paired, keep the current Platform-Tools installation up to date and leave Wireless debugging enabled only on networks you trust. If a connection disappears, first check that both devices are back on the same trusted Wi-Fi network, then use adb server-status and the mDNS diagnostic command before deleting the pairing. That approach tells you whether the problem is the ADB installation, discovery, or the network itself.
The practical promise of ADB Wi-Fi 2.0 is therefore fairly specific: less cable handling and less connection maintenance, rather than a completely different debugging system. If your Android development routine already involves frequent physical-device testing, setting it up once can remove one of the most repetitive parts of that workflow.
Written by